Archives of Loren Williams Fly Tying Tutorials.
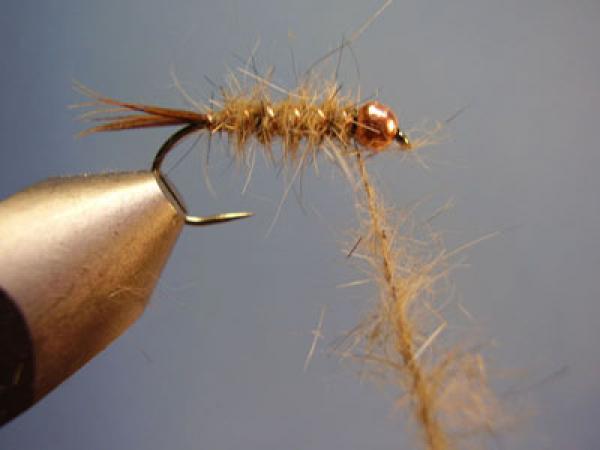
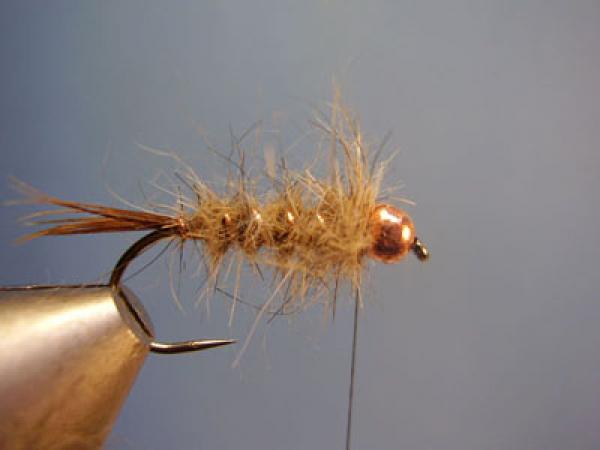
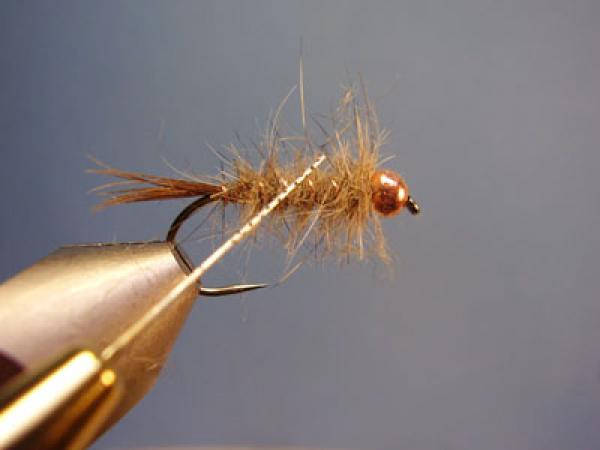
Hare and Copper
Fly and photos by Loren Williams
MATERIAL LIST
Hook: Partridge Flashpoint BIN (Barbless Ideal Nymph) #8-#18
Bead: Copper Tungsten
Weight: Lead Wire
Tail: Cock Pheasant Tail Fibers
Rib: Oval Copper Tinsel under Clean Mono Thread
Body: Hare's Mask Dubbing
Click on photos to enlarge!
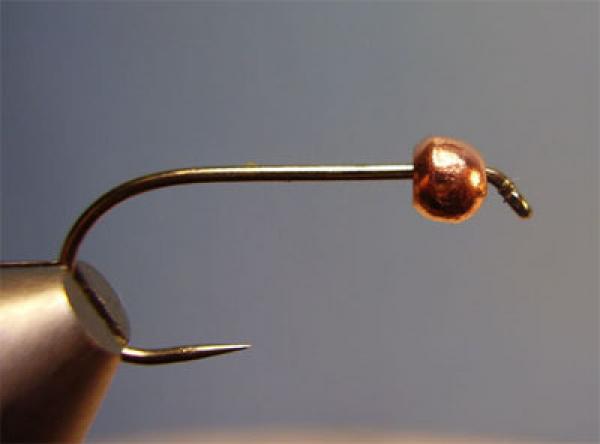
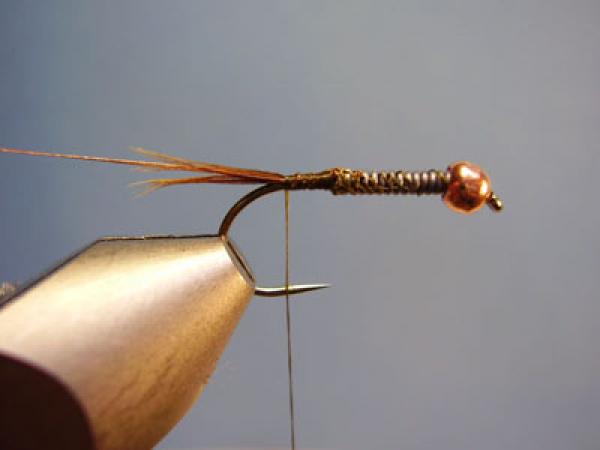
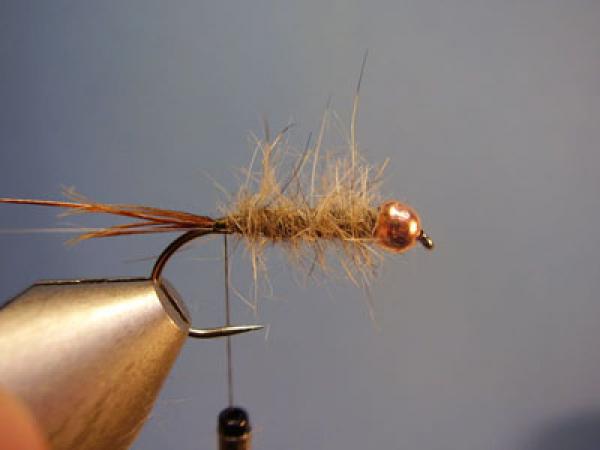
Slide a copper bead onto the hook and mount the hook in the vise.
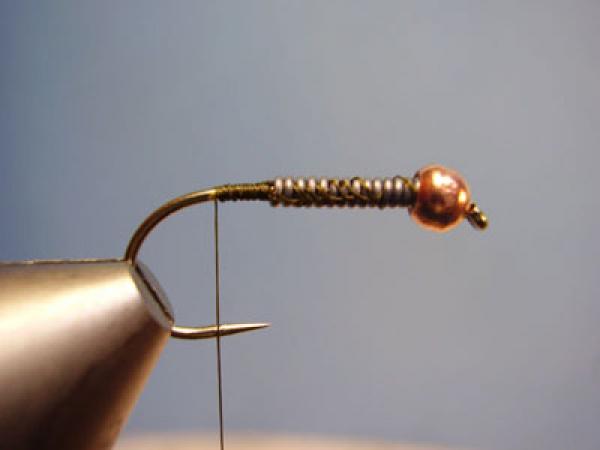
Wrap 2/3 of the shank with lead wire whose diameter roughly equals the hook's wire diameter. Slide the lead up against the bead. Attach tying thread and secure the lead so that it does not spin. Advance thread to the rear, just before the bend of the hook.
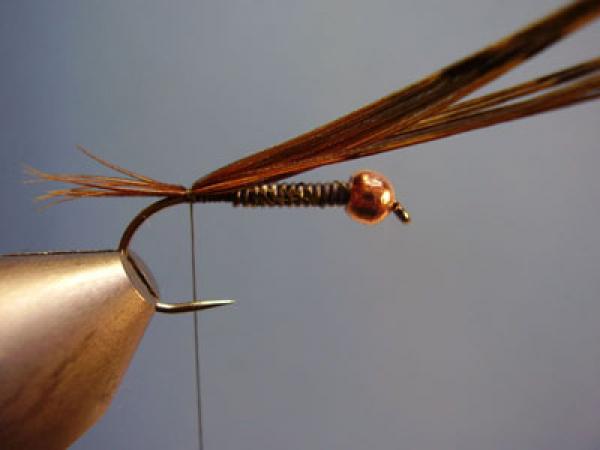
Select a small bunch of Pheasant Tail fibers and measure them to be equal to 1/2 the overall hook length. Secure using 3 tight thread wraps.
Bind down the butt ends of the PT fibers to fill in the gap behind the lead wire to help form a pleasing taper. Cut the excess fibers.
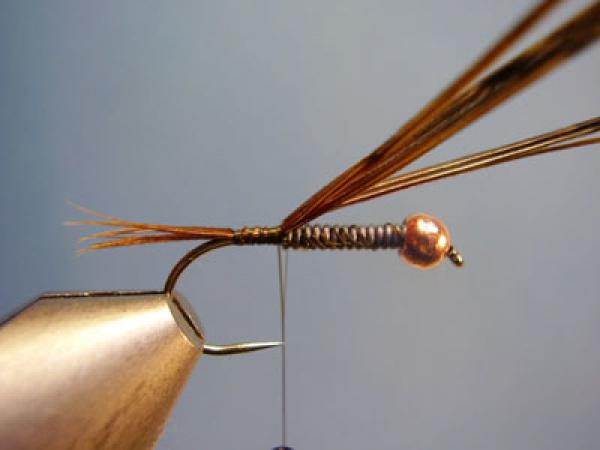
Secure a length of oval copper tinsel, again using the material to fill-in the rearward gap. Be sure to affix the tinsel to the backside of the hook and bind it back to the start of the tail.
Secure clear monofilament thread to the nearside of the hook and bind it to the start of the tail.
Advance the tying thread to the front of the hook, just behind the bead.

Using Loon's HIGHTACK SWAX,apply the dubbing wax to a section of tying
thread long enough to dub back to the tail.
Touch-dub the thread with Hare's mask dubbing. The dubbing should be applied sparsely. After touch-dubbing the thread, spin the bobbin clockwise so that the thread twist secures the dubbing and gives it more uniform distribution.
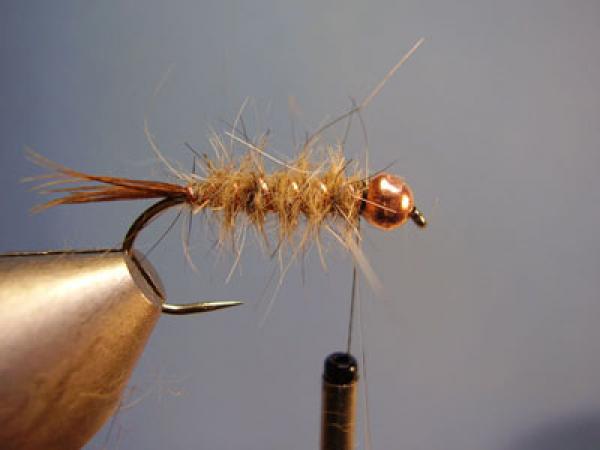
Wrap the dubbing to the rear.
Repeat the touch-dubbing process back to the front.
Note: On small flies you can simply apply the touch-dubbing once from rear to front. The method illustrated will result in a more durable, larger, fly with all lead wraps covered.
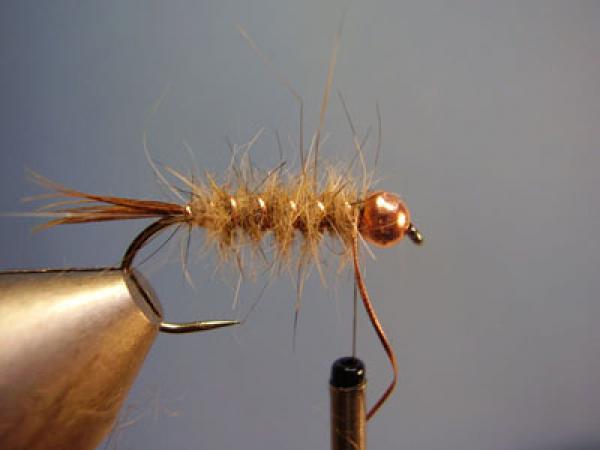
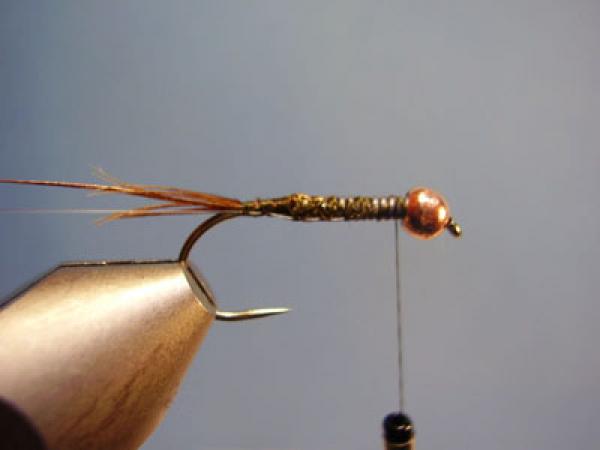
Advance the copper tinsel forward by counter-ribbing (for righties: counterclockwise when looking at the eye) with open and even wraps. Secure just behind the bead with a few tight thread wraps. Counter-ribbing allows the ribbing to be more visible and adds a degree of reinforcement.
Advance the clear mono thread forward, with a standard (for righties: clockwise, looking at the eye) palmer, to secure the ribbing. Secure behind the bead. This will secure the ribbing and further reinforce the fly. I do this to practically all patterns with ribbing as it takes very little time but greatly extends the life of the pattern.
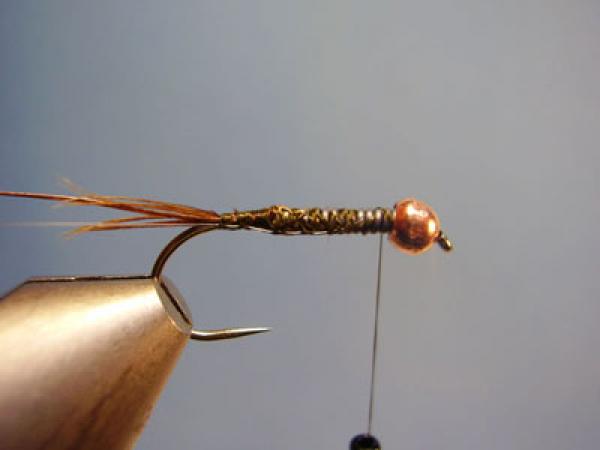
Touch-dub a short section of thread and twist the thread.
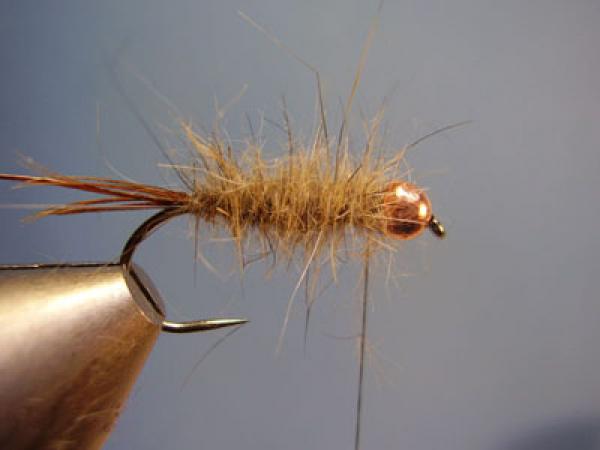
Dub a spiky collar behind the bead to high the thread wraps from the ribbing.
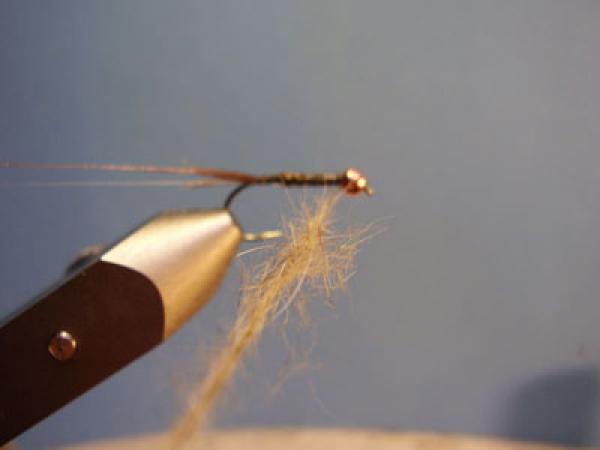
Without making any additional thread wraps, whip finish behind the bead and clip the thread. If necessary, use a dubbing tool to pick-out the hare's mask guard hairs.
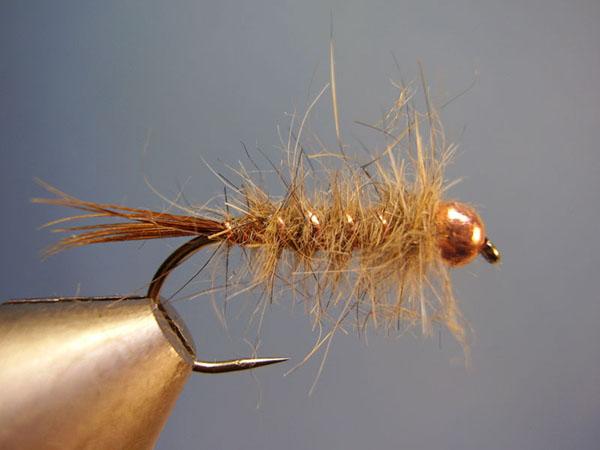
Completed Hare and Copper nymph!